 记录本站Nignx CentOS申请Let's Encrypt免费ssl证书并部署https过程
Let’s Encrypt是很火的一个免费SSL证书发行项目,自动化发行证书,证书有90天的有效期,可以续期。
Let’s Encrypt基于ACME协议自助颁发证书的过程由工具certbot完成,在linux下安装certbot后也就是certbot命令。
Let’s Encrypt官方网站:https://letsencrypt.org/
certbot教程网站:https://certbot.eff.org/
cerbot说明:https://certbot.eff.org/docs/
安装certbot有几种方式
官网获取安装代码:根据选择的Web服务器、操作系统版本自动生成安装代码
Clone源代码
下载release包
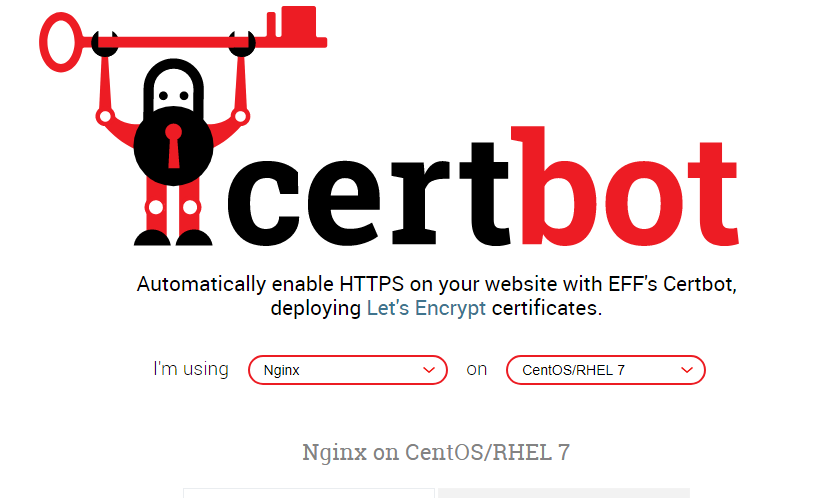
本站环境Nignx+CentOS7,三种方式均做了尝试,官网获取方式安装时提示Requires:python2-psutil>=2.1.0,查看已安装的python 版本是2.7.5,懒得再升级就用了其他方式。实际测试Clone源代码和下载release包均可以。注意官网获取方式CentOS6/7很大不同,而Clone源代码和下载release包CentOS6/7通用。
访问certbot官网,选择web服务器以及系统版本,网站会生成安装代码
##安装epel-release扩展包
yum install epel-release
##更新yum缓存
yum makecache
##直接yum安装certbot
yum install certbot
git clone https://github.com/certbot/certbot
会生成cerbot目录,目录内包含可执行文件certbot-auto
在https://github.com/certbot/certbot/releases查看最新版本下载地址,此时最新是v0.20.0
wget https://github.com/certbot/certbot/archive/v0.20.0.tar.gz
tar zxvf certbog.tgz
##为了方便重命名为certbot
mv certbot-0.20.0 certbot
重要:如果是方式一官网获取安装代码方式安装的cerbot,则可在任意目录下直接使用cerbot命令,若是使用方式二或三下载的源代码则需要进入到certbot目录,使用./certbot-auto
certbot申请SSL证书有多种方法可选,主要讲解非standalone模式。
这种模式需要指定网站根目录以及域名,在生成SSL过程中会在网站根目录下生成.well-know隐藏目录(以及用于效验域名所有者的特定文件),而nginx对web根目录下的隐藏目录默认情况下是不允许访问的,所以需要将对应虚拟主机网站根目录下的.well-known隐藏目录设置成允许访问。
不要和类似配置冲突就行,如果配置文件包含类似localtion...{deny all}的字段,将下面这段放在其前面就行。
#为SSL添加.well-known隐藏目录的访问
location ~ /.well-known {
allow all;
}
#进到cerbot目录
cd certbot

./certbot-auto certonly --email 你的邮箱 --agree-tos --no-eff-email --webroot -w 网站根目录 -d 域名
./certbot-auto certonly --email 邮箱 --agree-tos --no-eff-email --webroot -w 网站根目录 -d 域名1 -d 域名2
本站实例
./certbot-auto certonly --email [email protected] --agree-tos --no-eff-email --webroot -w /www/wwwroot/www.augustdoit.info -d www.augustdoit.info -d augustdoit.info
./certbot-auto certonly --email 邮箱 --agree-tos --no-eff-email --webroot -w 网站A根目录 -d 网站A域名1 -d 网站A域名2 -w 网站B根目录 -d 网站B域名1 -d 网站B域名2
输出
IMPORTANT NOTES:
 - Congratulations! Your certificate and chain have been saved at:
   /etc/letsencrypt/live/www.augustdoit.info/fullchain.pem
   Your key file has been saved at:
   /etc/letsencrypt/live/www.augustdoit.info/privkey.pem
   Your cert will expire on 2018-03-12. To obtain a new or tweaked
   version of this certificate in the future, simply run certbot-auto
   again. To non-interactively renew *all* of your certificates, run
   "certbot-auto renew"
 - Your account credentials have been saved in your Certbot
   configuration directory at /etc/letsencrypt. You should make a
   secure backup of this folder now. This configuration directory will
   also contain certificates and private keys obtained by Certbot so
   making regular backups of this folder is ideal.
 - If you like Certbot, please consider supporting our work by:

   Donating to ISRG / Let's Encrypt:   https://letsencrypt.org/donate
   Donating to EFF:                    https://eff.org/donate-le
生成的证书会存在/etc/letsencrypt/live/www.augustdoit.info/ 目录下

重启nginx,测试是否生效(看本站效果)
systemctl restart nginx
./certbot-auto --help all
或者
Let’s Encrypt的证书有效期是90天,期前更新证书即可。
cd certbot
./certbot-auto renew
添加计划任务
crontab -e
添加如下几行
30 3 1 * * sh /root/certbot/certbot-auto renew >> /var/log/letsencrypt/renew.log
35 3 1 * * service nginx restart
每月1日3时30分续期,日志保存在 /var/log/letsencrypt/renew.log
每月1日3时35分续期,重启nginx