 记录VPS(Centos)安装配置LAMP创建虚拟主机(多站点)过程
环境
VPS 最小化安装 Centos 6 32位
安装命令行Web浏览器
在没有Gui的Centos下,应有一款看网站的命令行浏览工具,例如links
yum install links
yum install httpd
输出显示默认已安装
service httpd start

chkconfig httpd on
links 127.0.0.1
输出

默认情况下,位于 /etc/httpd/ 目录下的所有以 .conf 结尾的文件都会被读取,并按照字母顺序加载做为 Apache 的配置,所以需要在 /etc/httpd/conf.d/ 下新建一个配置文件 vhost.conf 来配置虚拟主机。可以参考官网vhost.conf 配置实例。
vi /etc/httpd/conf.d/vhost.conf
输入内容如下:
NameVirtualHost *:80

<VirtualHost *:80>
    ServerName blog.wanglaodao.com
    DocumentRoot /srv/www/blog
<Directory "/srv/www/blog/">
    Options FollowSymLinks
    AllowOverride All
</Directory>
ErrorLog /srv/www/bloglogs/error.log
CustomLog /srv/www/bloglogs/access.log combined
</VirtualHost>

<VirtualHost *:80>
    ServerName bbs.wanglaodao.com
    DocumentRoot /srv/www/bbs
<Directory "/srv/www/bbs/">
    Options FollowSymLinks
    AllowOverride All
</Directory>
ErrorLog /srv/www/bbslogs/error.log
CustomLog /srv/www/bbslogs/access.log combined
</VirtualHost>
一级域名wanglaodao.com是从aliyun购买的,所以进入到阿里云管理控制台添加域名解析
添加二级域名:
blog.wangldaodao.com
bbs.wangldaodao.com
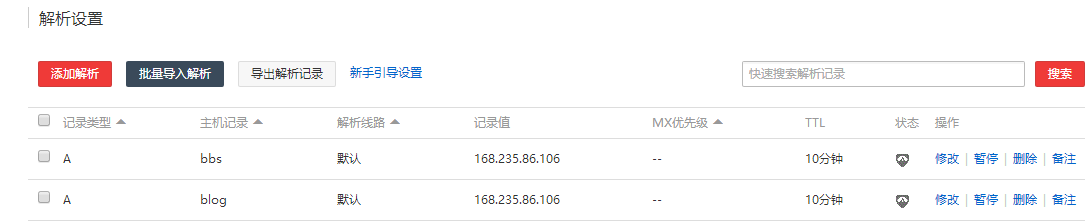
很简单,记录类型A,主机记录分别为blog,bbs,解析线路默认,记录值为vps的ip地址,TTL默认不变。
创建文件夹
mkdir /srv/www/blog -p
mkdir /srv/www/bbs -p
mkdir /srv/www/bloglogs -p
mkdir /srv/www/bbslogs -p
httpd -t
输出:
httpd: apr_sockaddr_info_get() failed for august
httpd: Could not reliably determine the server's fully qualified domain name,using 127.0.0.1 for ServerName
Synax Ok
这个问题应该是没有在 /etc/httpd/conf/httpd.conf 中设定 ServerName。所以apache会用主机上的名称(august)来取代,首先会去找 /etc/hosts 中有没有主机的定义。
解决办法:
vi /etc/hosts
添加
127.0.0.1 august
再次测试OK
cd /etc/yum.repos.d
vi MariaDB.repo
输入内容如下:
# MariaDB 5.5 CentOS repository list - created 2015-12-12 10:13 UTC
# http://mariadb.org/mariadb/repositories/
[mariadb]
name = MariaDB
baseurl = http://yum.mariadb.org/5.5/centos6-x86
gpgkey=https://yum.mariadb.org/RPM-GPG-KEY-MariaDB
gpgcheck=1
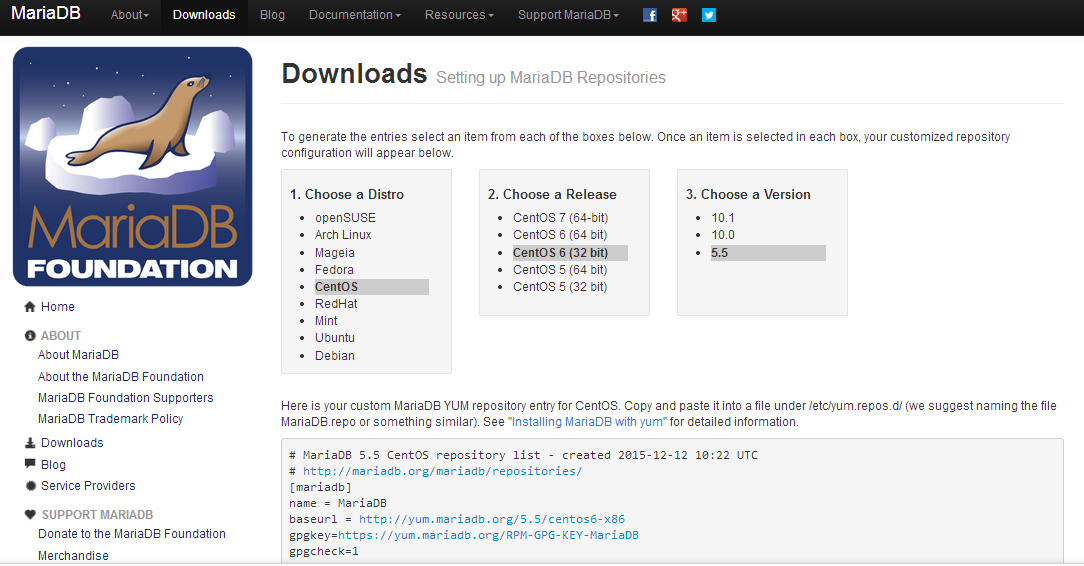
说明:以上输入内容从MariaDB官网下载页面获取,选择Centos版本以及需要安装的MariaDB版本后由官网给出,博主这里是Centos6 32位,MariaDB版本为5.5。
官网获取代码示意图:
yum install MariaDB-server MariaDB-client
service mysql start

chkconfig mysql on
mysql_secure_installation
这里需要配置 mysql 根用户和密码、清除其他用户、清除不需要的数据库等。输出类似于下面的执行过程,其中需要我们从键盘输入的内容已注释:
# /usr/bin/mysql_secure_installation
/usr/bin/mysql_secure_installation: line 379: find_mysql_client: command not found

NOTE: RUNNING ALL PARTS OF THIS SCRIPT IS RECOMMENDED FOR ALL MariaDB
SERVERS IN PRODUCTION USE! PLEASE READ EACH STEP CAREFULLY!

In order to log into MariaDB to secure it, we'll need the current
password for the root user. If you've just installed MariaDB, and
you haven't set the root password yet, the password will be blank,
so you should just press enter here.

Enter current password for root (enter for none):   //这里直接回车,这里可不是 Linux root 用户,而是 MariaDB 数据库的 root 用户
OK, successfully used password, moving on...

Setting the root password ensures that nobody can log into the MariaDB
root user without the proper authorisation.

Set root password? [Y/n] y
New password:                //输入你的数据库root用户密码
Re-enter new password:       //再输入一遍
Password updated successfully!
Reloading privilege tables..
... Success!
By default, a MariaDB installation has an anonymous user, allowing anyone
to log into MariaDB without having to have a user account created for
them. This is intended only for testing, and to make the installation
go a bit smoother. You should remove them before moving into a
production environment.

Remove anonymous users? [Y/n] y
... Success!

Normally, root should only be allowed to connect from 'localhost'. This
ensures that someone cannot guess at the root password from the network.

Disallow root login remotely? [Y/n] y
... Success!

By default, MariaDB comes with a database named 'test' that anyone can
access. This is also intended only for testing, and should be removed
before moving into a production environment.

Remove test database and access to it? [Y/n] y
- Dropping test database...
... Success!
- Removing privileges on test database...
... Success!

Reloading the privilege tables will ensure that all changes made so far
will take effect immediately.

Reload privilege tables now? [Y/n] y
... Success!

Cleaning up...

All done! If you've completed all of the above steps, your MariaDB
installation should now be secure.

Thanks for using MariaDB!
然后使用 MySQL 的 root 帐户(不同于 Linux 的 root 帐户,刚才设置密码了)登录进去
mysql -u root -p
输入密码后回车,下面是输出示例,可以看到命令提示符变为 MariaDB [(none)]>
# mysql -u root -p
Enter password:
Welcome to the MariaDB monitor. Commands end with ; or \g.
Your MariaDB connection id is 12
Server version: 5.5.47-MariaDB MariaDB Server

Copyright (c) 2000, 2015, Oracle, Monty Program Ab and others.

Type 'help;' or '\h' for help. Type '\c' to clear the current input statement.

MariaDB [(none)]>
PHP是用于web基础服务的服务器端脚本语言。它也经常被用作通用编程语言。
yum install php

//根据CMS需求安装模块 常用的如:php-mysql php-pdo php-gd php-mbstring

yum install php-gd php-ldap php-odbc php-pear php-xml php-xmlrpc php-mbstring php-snmp php-soap curl curl-devel
安装完成php后,确认重启Apache服务以便在Web浏览器中渲染PHP。
service httpd restart
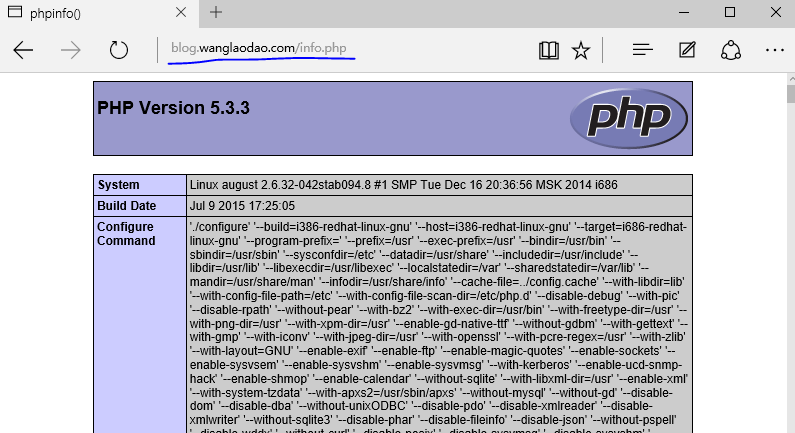
网站根目录创建phpinfo.php验证PHP。
vi /srv/www/blog/info.php
编辑内容如下:
<?php
phpinfo();
?>
验证
安装使用EPEL安装源
yum install epel-release
安装phpmyadmin
yum install phpmyadmin
配置phpmyadmin,使phpmyadmin允许远程登陆
vi /etc/httpd/conf.d/phpMyAdmin.conf
内容如下
[...]
Alias /phpMyAdmin /usr/share/phpMyAdmin
Alias /phpmyadmin /usr/share/phpMyAdmin

//以下内容全部用#注释掉
#<Directory /usr/share/phpMyAdmin/>
#   AddDefaultCharset UTF-8
#   <IfModule mod_authz_core.c>
#
#     # Apache 2.4
#     <RequireAny>
#       Require ip 127.0.0.1
#       Require ip ::1
#     </RequireAny>
#   </IfModule>
#   <IfModule !mod_authz_core.c>
#     # Apache 2.2
#     Order Deny,Allow
#     Deny from All
#     Allow from 127.0.0.1
#     Allow from ::1
#   </IfModule>
#</Directory>

//以下内容新增加
<Directory /usr/share/phpMyAdmin/>
    Options none
    AllowOverride Limit
</Directory>

[...]
更改Cookie身份验证方式为http
vi /etc/phpMyAdmin/config.inc.php
修改内容如下:
[...]
$cfg['Servers'][$i]['auth_type']     = 'http';    // Authentication method (config, http or cookie based)?  将cookie 改为http
[...]
重启apache
service httpd restart
测试
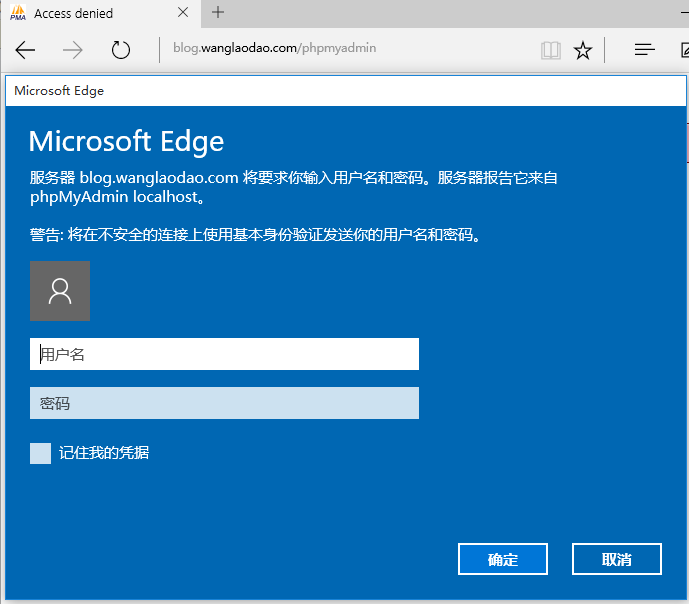
按提示填入账号密码:
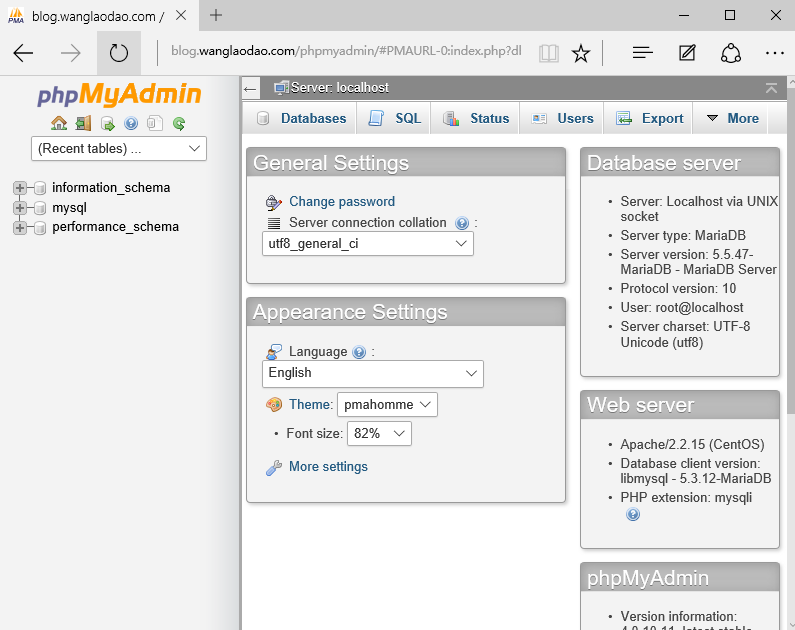
至此 LAMP配置完毕。
Virtualbox下Centos 7配置LAMP:Centos7配置LAMP
Virtualbox下Centos7配置LNMP:Centos7配置LNMP
VPS Centos 6配置LAMP:VPS Centos 6配置LNMP